
This is one of the oldest and very simple NDT examination. It is also known as Liquid Penetrant Inspection (LPI) or Penetrant Testing (PT). In 19th century, it was done using kerosene and oil mixture.
Dye penetrant inspection is used to detect any surface-connected discontinuities such as cracks from fatigue, quenching, and grinding, as well as fractures, porosity, incomplete fusion, and flaws in joints.
[google-square-ad]
Principles of working
This method of inspection is based on capillary action, where low surface tension fluid penetrates into clean and dry surface fractures. Penetrant can be applied to the test component by dipping, spraying, or brushing. After adequate penetration time has been allowed, the excess penetrant is removed, a developer is applied. The developer helps to draw penetrant out of the flaw where an invisible indication becomes visible to the inspector. Inspection is performed under ultraviolet or white light, depending upon the type of dye used – fluorescent or nonfluorescent (visible).
Materials Used
Penetrants are classified into sensitivity levels.
- Visible penetrants : Mostly red in color, have lowest sensitivity.
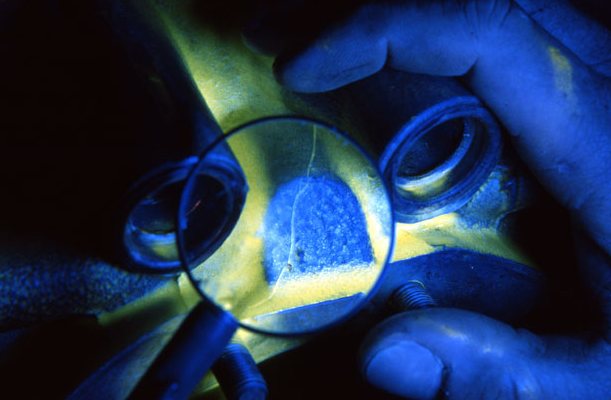
- Fluorescent penetrants : Contain two or more dyes that fluoresce when excited by ultraviolet (UV-A) radiation (also known as black light). This is done in dark environment, and the excited dyes emit brilliant yellow-green light that contrasts strongly against the dark background. This material is more sensitive to defects.
[google-square-ad]
Level of inspection sensitivity to choose depends on testing environment, surface finish of specimen and size of defect to inspect. One must also assure that the test chemicals are compatible with the sample so that the examination will not cause permanent staining, or degradation.
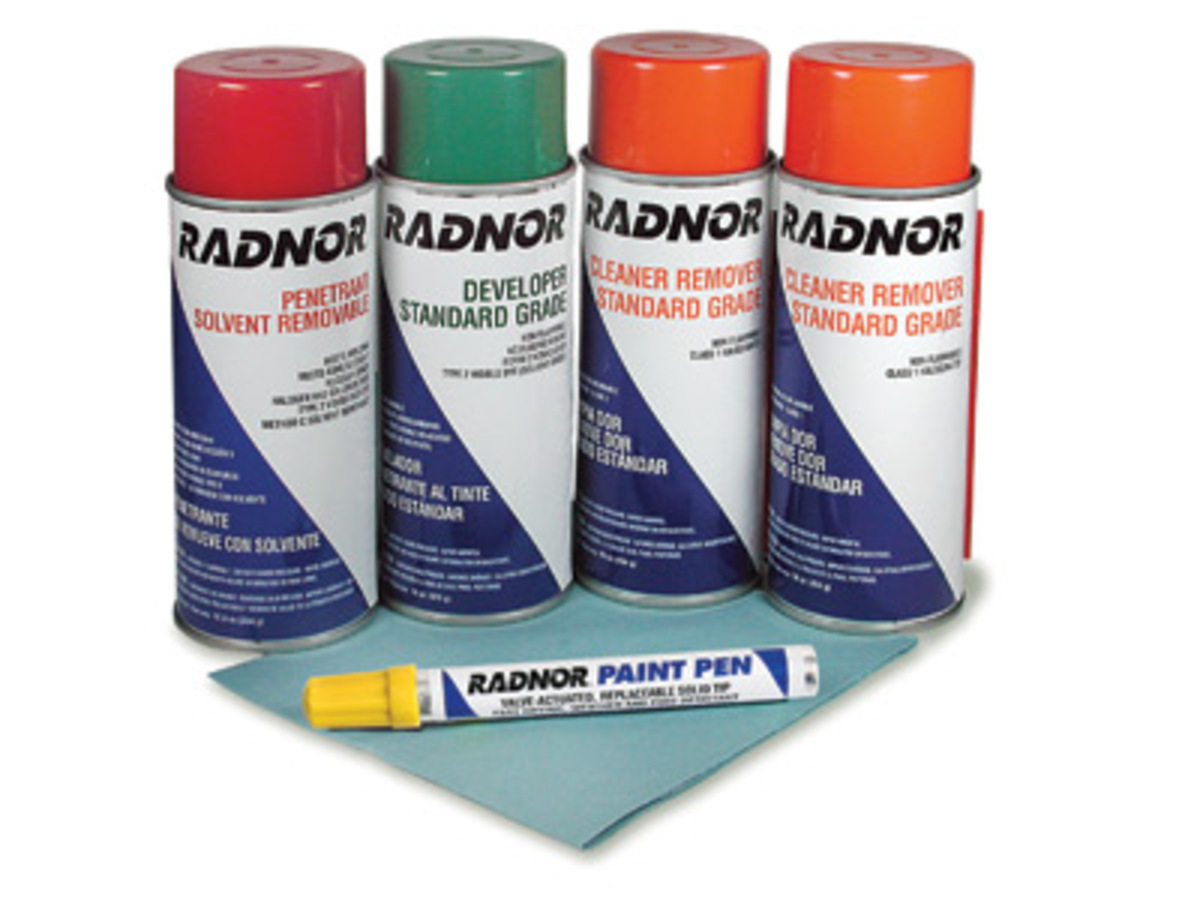
Kit required for this testing can be as simple as 3 aerosol cans which are often sold together by kit providers. All that additionally needed is some lint free cloths, and sufficient visible light. Advanced versions of kit can be made of a stationary systems with dedicated application, wash, and development stations. They are more costly and complicated, but have better sensitivity and higher samples through-put.
Inspection steps
Pre-Cleaning :
Test procedure starts with cleaing of test surface to remove any dirt, paint, oil, grease or any loose scale. These impurities can either keep penetrant out of a defect, or cause irrelevant or false indications. Cleaning methods may include solvents, alkaline cleaning steps, vapor degreasing, or media blasting.
The purpose of this step is a clean surface where any defects present are open to the surface, dry, and free of contamination. If media blasting is used, it may “work over” small discontinuities in the part, and an etching bath is recommended as a post-blasting treatment.
[google-square-ad]
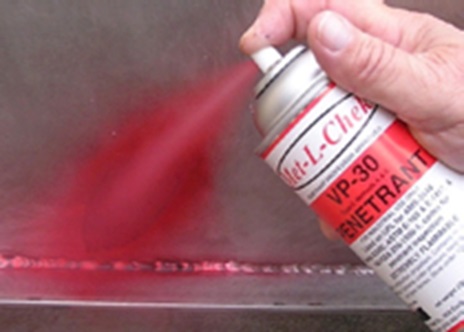
APPLICATION OF PENETRANT:
The penetrant is then applied to the surface of the item being tested. The penetrant is allowed “dwell time” to soak into any flaws (generally 5 to 30 minutes). The dwell time mainly depends upon the penetrant being used, material being tested and the size of flaws sought. As expected, smaller flaws require a longer penetration time. Due to their incompatible nature one must be careful not to apply solvent-based penetrant to a surface which is to be inspected with a water-washable penetrant.
[google-square-ad]
EXCESS PENETRANT REMOVAL:
Next step is to remove excess penetrant from the surface. The removal method depends on the type of penetrant used.
-
- Water-washable,
- Solvent-removable,
- Lipophilic post-emulsifiable,
- hydrophilic post-emulsifiable
Emulsifiers represent the highest sensitivity level, and chemically interact with the oily penetrant to make it removable with a water spray.
When using solvent remover and lint-free cloth it is important to not spray the solvent on the test surface directly, because this can remove the penetrant from the flaws.
If excess penetrant is not properly removed, once the developer is applied, it may leave a background in the developed area that can mask indications or defects. In addition, this may also produce false indications severely hindering your ability to do a proper inspection.
[google-square-ad]
APPLICATION OF DEVELOPER:
After excess penetrant has been removed a white developer is applied to the sample. Type of developer used must be compatible with penetrant used. Various types of developer are :
- non-aqueous wet developer (NAWD) : Sample must be dried prior to application, available as aerosol spray cans containing acetone, isopropyle alcohol or combination of these two.
- dry powder,
- water suspendable : Used when part still wet from penetrant application.
- water soluble : Used when part still wet from penetrant application.
Do not use water-soluble or suspendable developer with water-washable penetrant). Developer should form a semi-transparent, even coating on the surface.
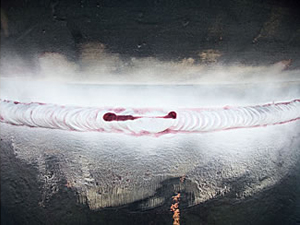
The developer draws penetrant from defects out onto the surface to form a visible indication, commonly known as bleed-out. Any areas that bleed-out can indicate the location, orientation and possible types of defects on the surface. Interpreting the results and characterizing defects from the indications found may require some training and/or experience.
[google-square-ad]
INSPECTION:
For visible dye penetrant, the inspector uses visible light with sufficient intensity (100 foot-candles or 1100 lux is typical).
For fluorescent penetrant examinations, ultraviolet (UV-A) radiation of sufficient intensity (1,000 micro-watts per centimeter squared is common), along with low ambient light levels (less than 2 foot-candles are used.
Depending on the type of product, inspection of the test surface takes place after 10 to 30 minutes of development time. This time delay allows the blotting action to occur.
The inspector may observe the sample for indication formation when using visible dye. It is also good practice to observe indications as they form because the characteristics of the bleed out are a significant part of interpretation characterization of flaws.
[google-square-ad]
POST CLEANING:
It is necessary to clean the test surface after inspection and recording of defects, especially if post-inspection coating processes are to be done.
 | 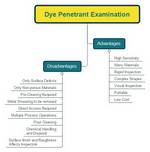 | |
| Dye penetration inspection has it own advantages and disadvantages compared to other non-destructive testing methods. [google-square-ad] ADVANTAGES …Read More.. | ||
|  | |
| Liquid penetrant inspection is used to detect any surface-connected discontinuities such as cracks from fatigue, …Read More.. | ||
[google-square-ad]